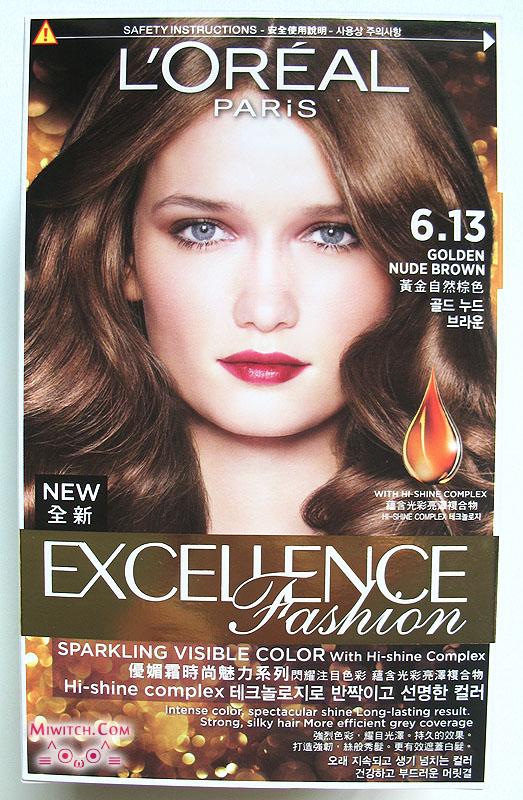
From now onwards, you'll find L'Oreal Paris New Excellence Fashion Luxurious Golds collection up on the shelves. So have you given them a try yet? (^-^)
Today, I am going to show how my hair turns out after using the 6.13 Golden Nude Brown from this collection.
Packaging
Surprising to see that the information on the box shows not only English and Chinese but also Korean! ^_^
Safety Instructions & Ingredients
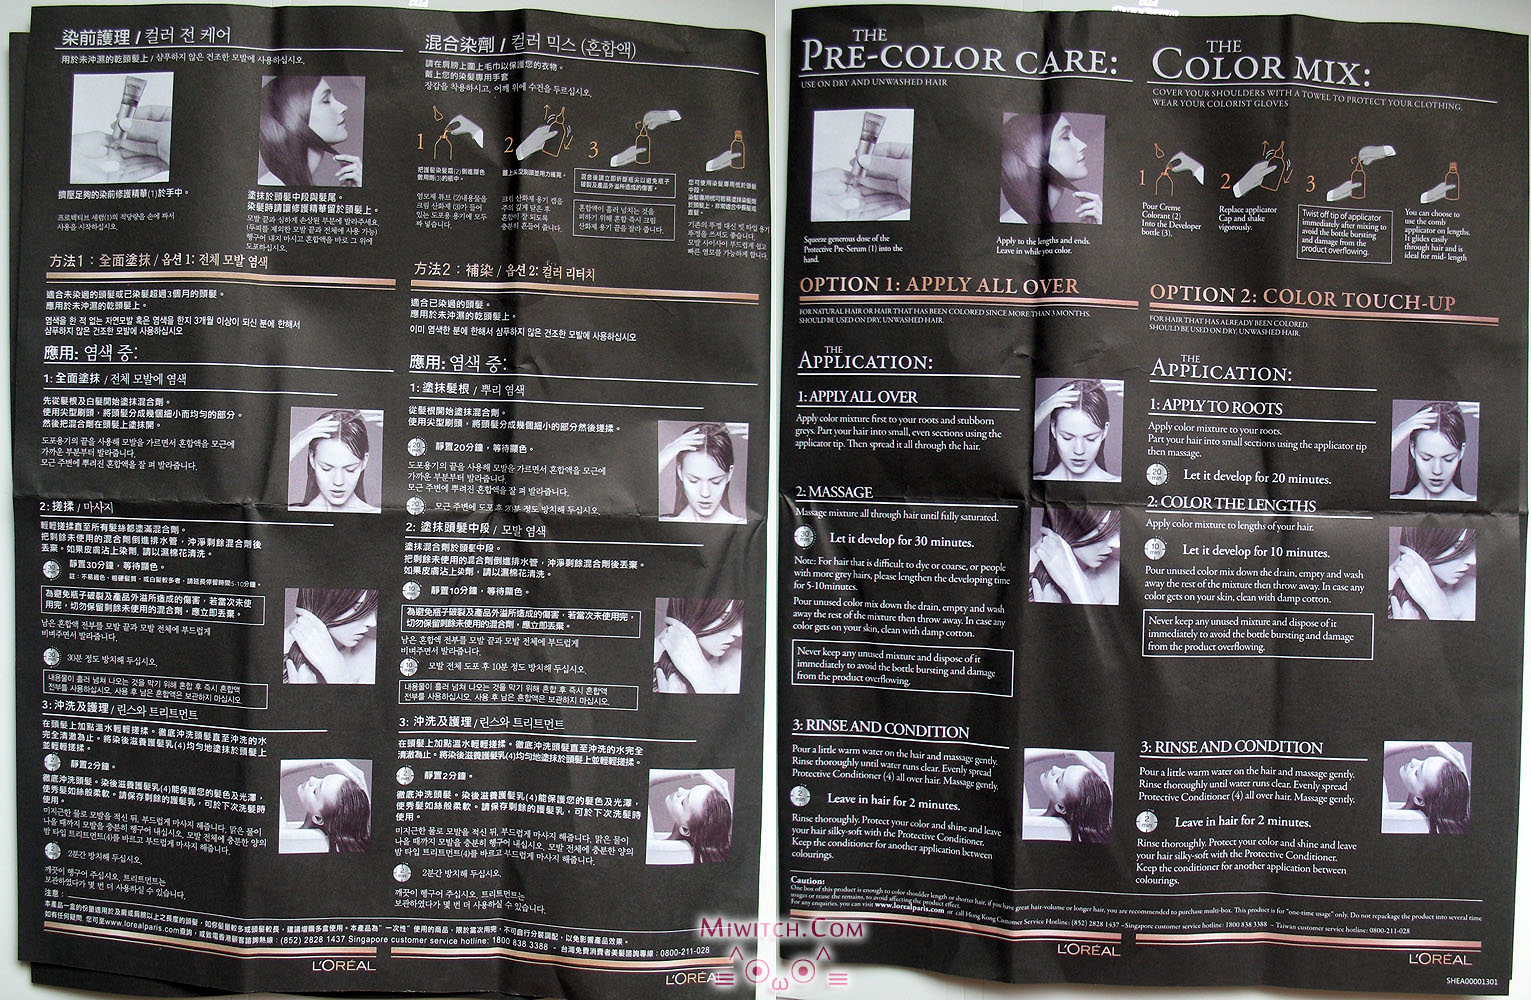
The right tab indicates that we should do a skin allergy patch test for 48 hours before proceeding with the hair dyeing. For more about patch test, refer to the instruction slip.
Total of 4-step products included in the box.
Protective Pre-Color Serum
Only to be applied on damaged part of the hair, usually are on the hair ends.
Protective Creme Colorant
Creme Developer
This comes with a comb applicator. Protective Creme Colorant is to be mixed into this Creme Developer and after mixing, replace the cap with the comb applicator for direct application of the dye onto the hair. However, I choose an alternative method to dye my hair which is shown later in this post.
Protective Conditioner
To be used as a conditioner or mask on the hair after rinsing off the hair dye.
Instruction slip
miwitch's hair dye
Here's all the products that I need including the instruction slip, so that I can refer just in case I miss out anything.
Step 1
As instructed, apply the Protective Pre-Color Serum on damaged area.
And so I applied it on my hair ends, they are ultra damaged due to constant bleaching and dyeing for many rounds previously and I didn't snip them because I want to grow my hair... ^,^"
Step 2 & 3
For these two steps, I do it my own way. I find that by using this method, I can achieve an even coat of hair dye on my hair than using the comb applicator.
All I need is a plastic bowl (recycled) and a hair dyeing brush.
Squeeze out Protective Creme Colorant into the bowl and then pour Creme Developer on it (doesn't matter even its vice versa).
Use the brush side of the hair dyeing brush and mix well, it will turn into nice creamy mixture. (Look like tau huey. Lolx~)
Below shows my hair separated into sections with clips. Pardon the messiness because I can't see my own back... lolx~
Usually it is best to separate the hair into as many sections as possible (eg, 8~10 sections) so you can get even coat of hairdye on every hair strand. But when I'm lazy... I just split them up to about 4~6 sections: 2 row by 2 columns, or 3 rows by 2 columns. The fringe will consider as 1 whole extra section.
After dyeing, I waited for 30 minutes. If it still gets lighter after 30 mins, I will wait for another 10 mins. If it doesn't change at all, then I'll rinse it off because longer waiting time doesn't mean that the hair will turn anymore lighter. So it's advisable not to wait for more than 1 hour as the hairdye will harm the hair and the scalp badly if it's left on for too long.
Step 4
After rinsing off the hair dye, I used up the whole bottle of Protective Conditioner on my hair. I treat it as a hair mask and let it stay on my hair for a few minutes before rinsing it off.
Review
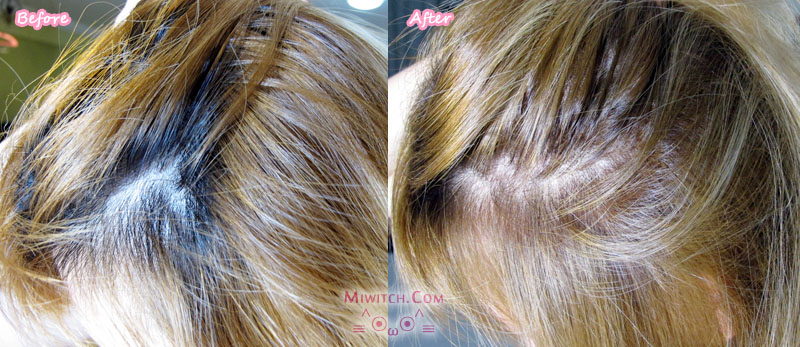
Before, I had black roots, dark yellowish brown to yellowish blonde hair with platinum blonde ends. The ends were previously bleached many times hence it is very dry and pale in colour.
After dyeing the whole head with 6.13 Golden Nude Brown, my roots turn golden brown and the dark yellowish brown parts turn light golden brown.
As I only had 1 box of dye and I started dyeing from the back, so at the time I reach the crown area I was left with very little dye. I then decide to concentrate on dyeing the roots, after which I use the excess dye coming from the hair at the nape area to spread onto my fringe. ^_^"
That's to say, 1 box of Excellence Fashion hair dye is only enough for above shoulder length hair. Anything longer than that, you'll need 2 boxes of hair dye.
Overall the tone changed into a light nude golden shade. As for my hair ends, it couldn't absorb the dye much as it was overly bleached in the past. Unless I bleach my hair once again before applying 6.13 on it, then it might be able to absorb the dye.
My root area underneath the blondes are pretty nice! ^_^
This is days before I dye my hair.... (Taken at an event with professional lighting and camera)
This is after the hair dye (taken with my own cam, indoor with natural sunlight from window)... Not so yellowish yah? Very close to my eyebrow shade! ^_^ I like the ombre happening around my temple area.. lolx~
I'd like to also mention that I kinda accidentally brushed the dye on my forehead which resulted a red dry patch appearing after 2-3days from the day I dyed my hair. The dry patch on my forehead took about 3-4weeks to heal. After experiencing this, I'll definitely be extra careful with hair dyes in the future. Plus, I'll also apply Vaseline around my hairline and forehead just in case accidents happen again.. ^_^"
L’Oréal Paris Excellence Fashion 6.13 Golden Nude Brown SGD$18.90
L’Oréal Paris Excellence Fashion 5.13 Ashy Nude Brown SGD$18.90
Where to buy?
Luxurious Golds collection (2 shades) will be available from August 2013 onwards in Singapore at:
Watsons, Guardian, major supermarkets and hypermarkets and selected departmental stores.
Websites
L'Oréal Paris Singapore Facebook
L'Oréal Paris Singapore Website
Till then! Cheers! (●♡●)
I am not affiliated to L'Oreal Paris (Singapore) and its company. Details & reference pictures are extracted from Press Release.


